
Contents
Pimping your Tattoo Machine is not easy. Here’s a quick guide on how to do it with 5 tips you can apply today.
Before you start
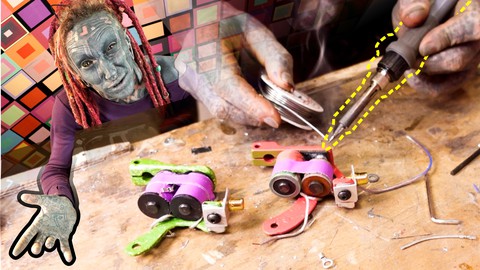
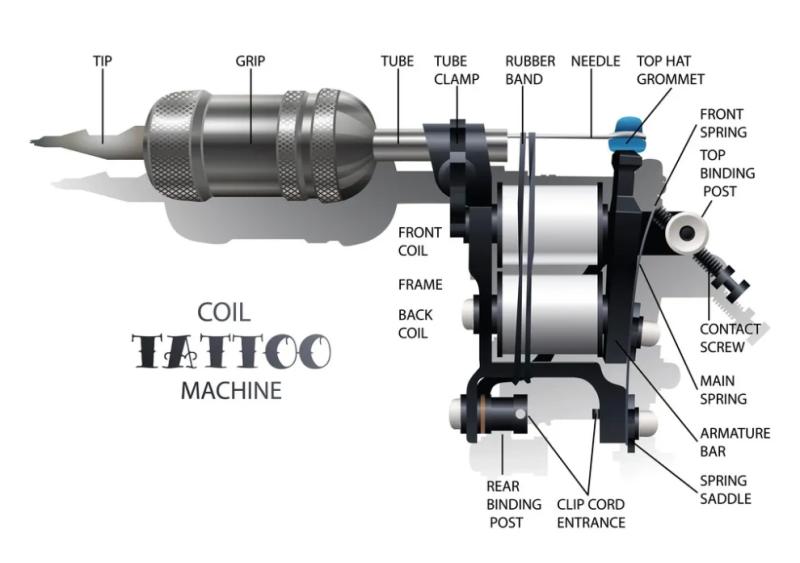
You need to understand how it works before disassembling it. Take an hour to learn about the different components of your machine, including the frame, coils, armature bar, springs, and contact screws. This knowledge will help you diagnose any issues and make informed decisions about which parts to replace or modify.
Take a course
If you have no idea what you’re doing, you need to start with a course, and then come back and check our tips. The course below covers everything you need to know to pimp your tattoo machine in a fun and concise manner.
How to Rebuild and Pimp Your Tattoo Machine

Our team did it and we regularly revisit it to check out specifics.
Why do you want to do it?
Knowing your goal will make it much easier to focus on what you want changed.
What don’t you like on your current machine?Is it the weight? Is it the noise? Is it the vibration on your hand?
What would make the experience for the client better? Is it how deep the needle goes? Is it how hard the needles hit?
Once you know your machine, you’ll know what you want to improve.

If you’re still using the good old stick, it’s time to upgrade.
5 Steps to Upgrading your Tattoo Coil Machine
1. Upgrade The Coils
The coils are one of the most important parts of your tattoo machine, as they are responsible for creating the electromagnetic field that drives the needles.
Upgrading your coils can help improve the performance and efficiency of your machine. Look for high-quality, hand-wound coils made from copper wire, which provide a stronger and more consistent magnetic field.
2. Modify the Springs
The springs on your tattoo machine control the tension and speed of the needles. By modifying the length or shape of your springs, you can customize the feel and performance of your machine.
For example, longer springs will produce a slower and softer hit, while shorter springs will create a faster and harder hit.
3. Replace the Armature Bar
The armature bar is the part of your tattoo machine that connects the coils to the needles. If your machine is not hitting as hard or as consistently as you’d like, you can always replace the armature bar, given that you can find a suitable substitute. Keep in mind that you should look for high-quality and lightweight materials such as titanium or aluminum to reduce vibration and improve the performance of the machine.
4. Clean Regularly
You will always have to maintenance your machines. I advice regularly cleaning and lubricating all moving parts to prevent rust and corrosion from the wear and tear.
5. Test it on Fake Skin
Before testing your machine on clients, make sure you spend at least 15 minutes on fake leather or a pomegranate or any other skin substitute of your choice. I can’t imagine how bad it would luck if your machine malfunctioned during a session.
And that’s it folks.
Again, if you still need more knowledge, be sure to visit a course that explains it. We advice this one as we really enjoyed it.
Pimping and rebuilding your tattoo gun is cool and will help you achieve better efficiency. With the right knowledge and tools, you can customize and upgrade your machine to suit your specific needs and preferences. Remember to take the time to learn about your machine and practice proper maintenance to keep it running smoothly for years to come.
More Content