Contents
If you’re starting a tattoo artist career, hygiene is about to become one of your priorities.
The autoclave is therefore an indispensable tool to make sure you only work with sterilized equipment and never infect your patients with pathogens.
And because hygiene as just as important as creativity in the tattoo world, we are dedicating this article to help you choose an autoclave, operate it your shop and make sure your studio’s safety and hygiene are at top notch levels.
Here’s What You’ll Learn
- What is an Autoclave?
- Step-by-Step Guide to Using an Autoclave for Tattooing
- Importance of Autoclaves in Tattoo Studios
- What To Consider When Choosing Your Autoclave
- Our Top Autoclave Picks
What is an Autoclave?
An autoclave is a device used in various industries, including healthcare and tattooing, to sterilize tools and equipment by subjecting them to high-pressure saturated steam.
This process effectively kills bacteria, viruses, fungi, and spores, rendering the instruments safe for use.
Step-by-Step Guide to Using an Autoclave for Tattooing
Setting Up The Autoclave
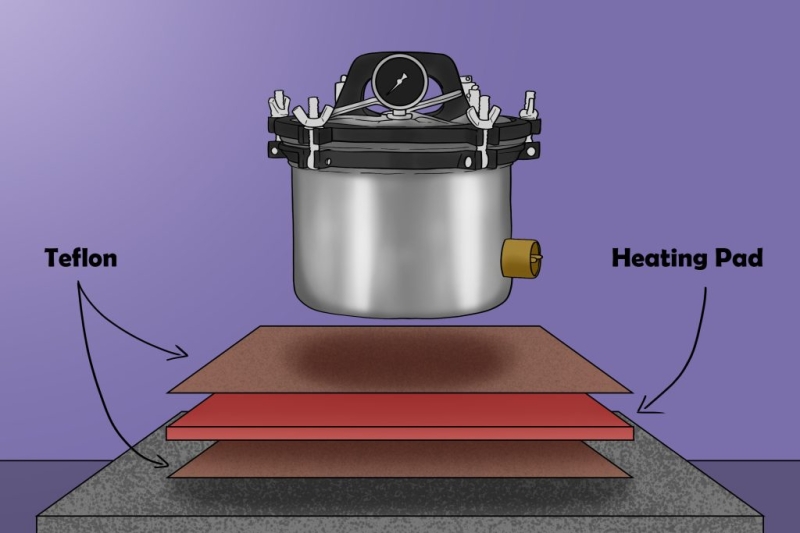
- Choose a solid, smooth and plain surface to place your autoclave on, prefereably concrete.
- Prepare the surface by placing a heating pad in between two sheets of teflon to guarantee the surface is heat-resistent.
Preparing the Equipment

- First of all, make sure you’re wearing gloves for the entire process.
- Gather all reusable tattooing equipment, including needles, grips, tubes, and other metal instruments.
- Disassemble the equipment as per manufacturer’s instructions, separating components that can be sterilized individually.
- Avoid electric parts such as coils or machines.
- Clean the equipment with disinfectant.
- Clean the equipment with alcohol to make sure no residues from the disinfectant remain, as they can damage the parts during the heating process.
- Place the disassembled equipment inside autoclave-approved sterilization pouches or containers.
- Ensure that the pouches are not overcrowded, allowing steam to circulate freely around each item for effective sterilization.
Loading the Autoclave
- Make sure the autoclave is not plugged in.
- Remove the loading bucket from inside the autoclave.
- Fill the reservoir where the heating ring is placed with distilled water. Mineral water will in time corrode the inside parts of your autoclave. Pour enough to cover the whole ring.
- Place the loading bucket back in.
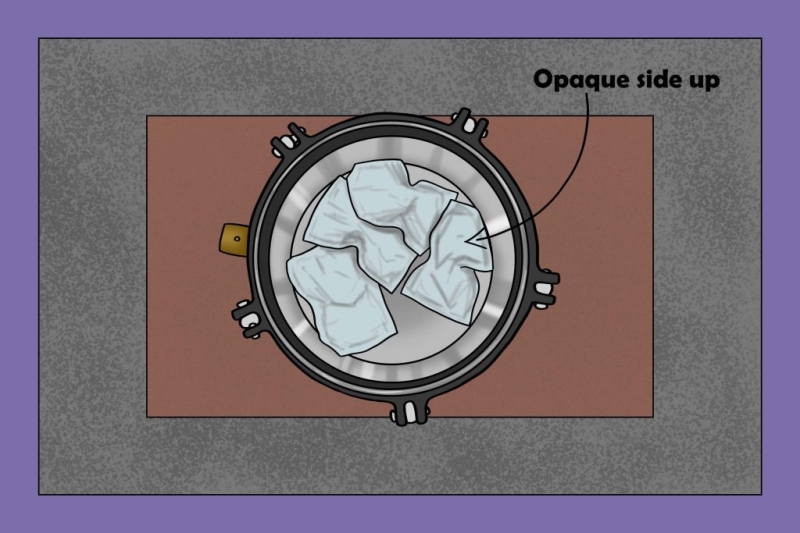
- Place the sterilization pouches inside the bucket facing down, with the paper side up so that it doesn’t gather steam. Avoid overlapping the pouches.
- Put the lid back on and screw the clumps tightly. Avoid tightening them up in circular order, one right next to the other; rather, skip them across diagonally.

Setting Parameters
- Refer to the manufacturer’s instructions for your specific autoclave model to determine the appropriate sterilization parameters.
- Adjust settings such as temperature, pressure, and cycle time according to the type of equipment being sterilized.
Initiating the Sterilization Cycle
- Make sure all the clumps are tightly sealed.
- Plug the autoclave in and start the sterilization cycle, following the manufacturer’s instructions for your autoclave model.
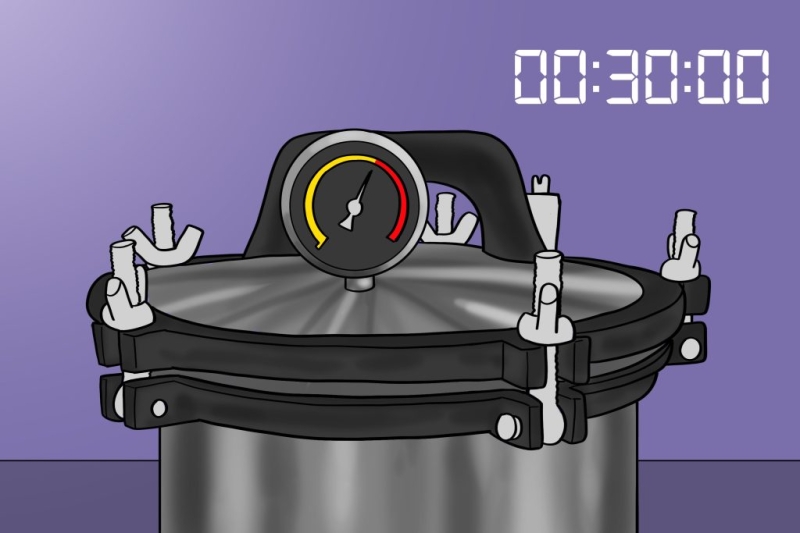
- Set the timer for the sterilization cycle. This only begins when the gauge actually displays built-up pressure and usually lasts around 25 to 30 minutes.
- Monitor the autoclave throughout the cycle to ensure proper operation and adherence to parameters.
Cooling and Drying

- Once the sterilization cycle is complete, unplug the autoclave.
- Pull the deflation valve up. Make sure you’re wearing heat-resistent gloves and be extra careful, as there will be a lot of steam flowing through it.
- Allow the autoclave to cool down. The pressure gauge should go down to zero before you start opening it.
- Unscrew the clumps in the same diagonal manner as you tightened them before. Everything will be really hot in this part of the process.
- Have another piece of teflon or a heat-resistent surface ready to place the lid on.
- Remove the lid.
Removing the Equipment

- Put on a new pair of sterilized gloves.
- Remove the sterilized pouches from the autoclave, place them on a stainless steel plate and allow them to air dry completely before opening them.
- Avoid using a fan to speed up the drying process as you might contaminate the sterilized equipment with residues.
Documentation and Record-Keeping
- Maintain thorough documentation of each sterilization cycle, including the date, time, equipment sterilized, and cycle parameters.
- Keep records organized and easily accessible for regulatory compliance and accountability.
Regular Maintenance and Monitoring
- Schedule routine maintenance and calibration of your autoclave to ensure optimal performance.
- Regularly monitor sterilization indicators and conduct spore tests to verify the effectiveness of the autoclave.
Importance of Autoclaves in Tattoo Studios
Sterilization of Equipment
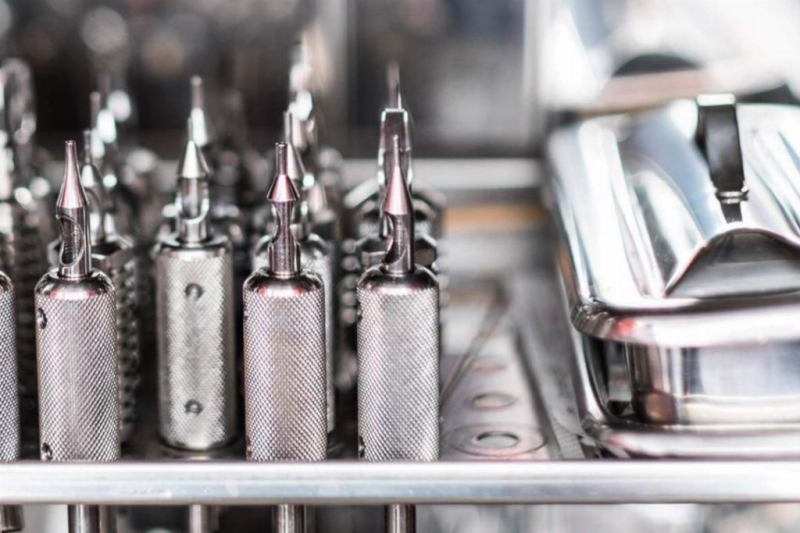
Tattooing involves the use of needles, grips, tubes, and other equipment that come into direct contact with the client’s skin.
Without proper sterilization, these tools can serve as vectors for transmitting infections, including hepatitis B and C, HIV, and various skin infections.
Autoclaving ensures that all equipment is free from harmful microorganisms, minimizing the risk of infection transmission.
Compliance with Health Regulations
Health regulations and guidelines set by authorities such as the Occupational Safety and Health Administration (OSHA) and local health departments mandate strict sterilization protocols for tattoo studios.
Autoclaves are a cornerstone of compliance with these regulations, as they provide a reliable method for achieving the required level of sterilization.
Client Safety and Peace of Mind
For clients, stepping into a tattoo studio can evoke a mix of excitement and apprehension.
Knowing that the studio adheres to rigorous sterilization practices, including autoclaving, can instill confidence and peace of mind.
Clients are more likely to trust and return to a studio that prioritizes their safety and well-being.
Protection of Artist and Staff
Tattoo artists and studio staff are also at risk of exposure to bloodborne pathogens during the tattooing process.
By ensuring that all equipment is properly sterilized, including reusable tattoo needles and grips, autoclaves play a vital role in protecting the health and safety of everyone in the studio environment.
Preservation of Reputation
In an industry built on trust and reputation, maintaining high standards of hygiene and safety is paramount.
A single instance of infection transmission due to inadequate sterilization practices can irreparably damage a tattoo studio’s reputation.
Autoclaves help safeguard the studio’s reputation by demonstrating a commitment to professionalism and client safety.
What To Consider When Choosing Your Autoclave
Capacity and Size
- Determine the volume of sterilization your tattoo studio requires based on the size of your operation and client base.
- Consider the physical dimensions of the autoclave to ensure it fits comfortably in your studio space without causing obstruction.
Sterilization Cycle Options
- Assess the autoclave’s cycle options, including pre-programmed cycles for different types of equipment and customizable cycle parameters.
- Look for autoclaves with rapid cycle options to accommodate busy studio schedules without compromising sterilization efficacy.
Sterilization Efficacy and Compliance
- Verify that the autoclave meets industry standards and regulatory requirements for sterilization efficacy, such as FDA clearance and compliance with sterilization guidelines.
- Check for features such as automatic shut-off and alarms to ensure proper sterilization and minimize the risk of operator error.
Ease of Use and Maintenance
- Opt for an autoclave with user-friendly controls and an intuitive interface for easy operation by studio staff.
- Consider the ease of maintenance, including accessibility for routine cleaning, water drainage systems, and availability of replacement parts.
Safety Features
- Prioritize autoclaves equipped with safety features such as pressure and temperature monitoring, door interlocks, and built-in safety valves to prevent accidents and ensure operator safety.
Budget and Cost of Ownership
- Establish a budget for purchasing an autoclave and consider the long-term cost of ownership, including maintenance, calibration, and consumables such as sterilization pouches and indicators.
- Compare the initial investment cost with the autoclave’s features, performance, and reputation to determine the best value for your studio.
Manufacturer Reputation and Support
- Research the reputation of autoclave manufacturers, including customer reviews, industry certifications, and after-sales support services.
- Choose a reputable manufacturer known for quality products and reliable customer service to ensure peace of mind and timely assistance when needed.
Our Top Autoclave Picks
If you’re having trouble choosing your autoclave, here are our favorite picks from the web.
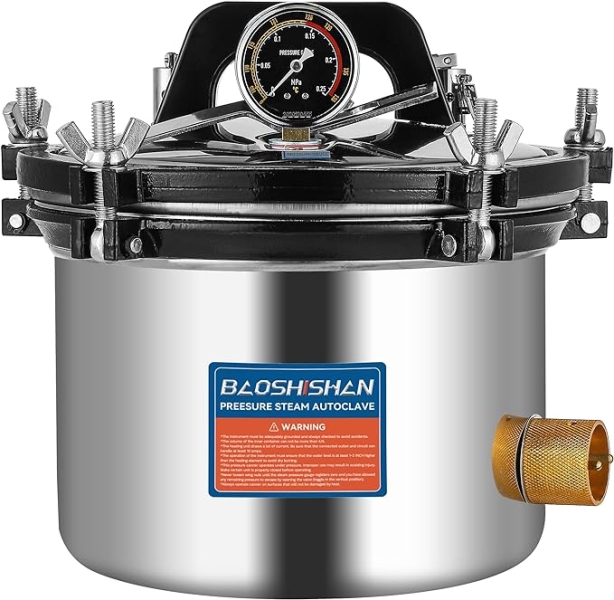
BAOSHISHAN 8L Electric Pressure Canner
Price: $195
Pros
- Cost-effective
- Stainless steel
Cons
- Generates lot of steam so requires proper ventilation
- No heat insulation at the bottom
Our Review
Baoshishan’s 8L (roughly 2.11 gallons) Electric Canner will definitely suit your basic autoclaving needs. It is compact yet robust enough to hold the average amount of sterilization pouches you’ll need for each session, so you can have it running in between clients if needed.
Keep in mind you’ll need to install it in an environment with proper ventilation so the great volume of steam it generates won’t accumulate in delicate areas of your shop. It’s also a good idea to prepare the surface you’ll be placing it on with a heating pad and Teflon sheets, as it generates a lot of heat in its bottom.
Our Grade: 8.5/10.0
WEST TUNE Autoclave Sterilizer

Price: $819
Pros
- Heat protective shell on the outside
- Digital temperature setting
Cons
- Most expensive option on our list
- May be too robust for some shops
Our Review
West Tune’s Autoclave Sterilizer is our top pick. It is silent and well-built, with a solid heat-resistant shell that makes it extra-safe to handle. Its most important feature is its digital temperature setting, which allows for minute precision when it comes to your sterilization process. It’s possible to ensure it will remain at the desired temperature for as long as it takes to complete its whole operation.
Of course, quality has its price, but that’s its only downside. Some artists may find it a bit too large, depending on the studio space you have available. However, you should take into consideration the fact that smaller autoclaves may generate more steam and therefore may end up requiring even more studio space to operate properly. So it’s not all about the surface it takes.
Trust us: this autoclave will be worth the extra penny.
Our Grade: 9.5/10.0
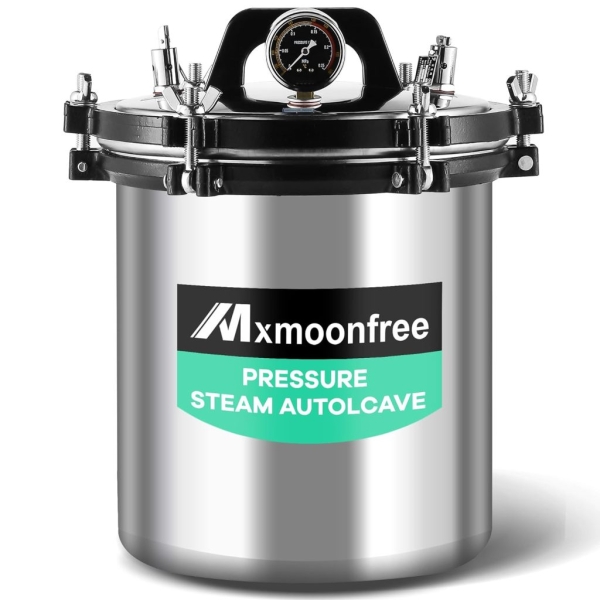
Mxmoonfree 19 Quart Autoclave
Price: $239
Pros
- Large capacity
- Efficient operation
Cons
- Unreliable customer service
- Fragile build
Our Review
The high-pressure steam autoclave from Mxmoonfree is designed with security in mind, featuring two valves that automatically deflate in case of device overpressure, ensuring safety without the risk of explosion. With fast heating capabilities, this portable autoclave reaches high temperatures quickly, allowing steam to effectively eliminate 99.99% of pathogens within just 15 minutes at 121 degrees Celsius.
This is a considerably large piece of equipment, boasting a loading capacity of 14.8L (3.9 gallons), with dimensions of 11 inches in diameter and 9.4 inches in height. Depending on your studio’s operations this might be a bit too much, but it will definitely save you some time by loading several pieces of equipment at once.
However, its build leans somewhat to the fragile side, so keep in mind that it may not last as long as the other options on this list.
Our Grade: 8.0/10.0
DACAT-RICHFU Autoclave

Price: $538
Pros
- Easy setup
- Large capacity
Cons
- No drying function
- Loud operation
Our Review
The Dacat-Richfu TR250E is similar to the Mxmoonfree in its size, with its 14L holding capacity. However, because of its horizontal display, it offers 3 layers of sterilization plates, allowing for maximum inside volume utilization.
It is easy to install and operate, with a screw seal to guarantee its safe operation. On the other hand, it is a bit loud, so it might be a problem to have it running in the background while in the middle of a tattoo session.
It’s still a very reliable piece of equipment that will ensure your sterilization process with ease.
Our Grade: 9.0/10.0
To Keep in Mind
The importance of maintaining a sterile environment cannot be overstated when it comes to running a safe and reliable tattoo studio.
Autoclaves serve as the backbone of hygiene and safety in every shop, ensuring that equipment is free from harmful microorganisms and compliant with health regulations.

By following our step-by-step guide after purchasing one of our top autoclave picks, you’ll definitely be on the safe side when it comes to studio hygiene.
This will ensure you not only protect the health and safety of clients and staff but also uphold your reputation as a trusted purveyor of body art.
If you need more guides to your shop’s equipment, check out this article about the material you need in your studio.
And remember to not get too technical with the clients. They want to trust you, not receive a hygiene class. So wee’ve also created a few tips on how to create a chill environment in your tattoo studio, make sure to check it out and continue growing your business.
