Contents
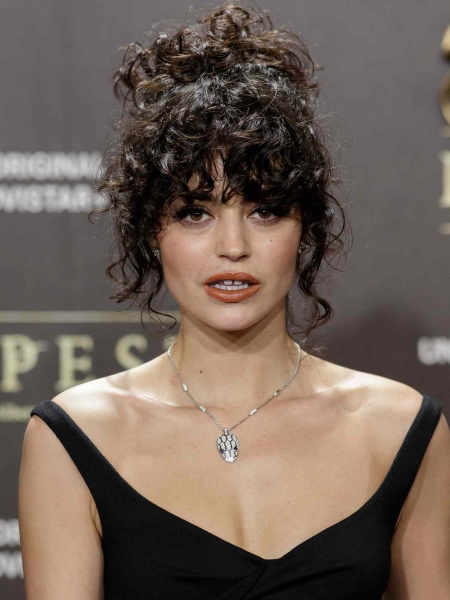
Raise your hand if you’ve ever been personally victimized by a messy bun! It always seems like we get the perfect messy bun when we throw up our hair late at night to binge a TV show, and when we actually try to do one on purpose, it looks misshapen and whacky. But what if we told you we had the perfect formula for creating the messy bun of your dreams?
Meet the expert
- Joey Scandizzo is an Australia-based hairstylist and the co-creative director of haircare brand ELEVEN Australia. Megan Schnell is a Chicago-based celebrity and bridal hairstylist. Kim Kimble is a hairstylist and the founder of Kim Kimble Hair Collection.
We tapped into three hair stylists, and we took notes on exactly how to do a messy bun. From a how-to guide to tips and tricks depending on your hair type, we’ve uncovered anything and everything there is to know about how to do a messy bun, below!
Guide to Doing a Messy Bun
Step 1: Start With Dry Hair
First things first, you’re going to want to start out with dry hair. Ideally, it won’t be freshly washed, in fact, dirty hair is going to be even better for that extra grit! Joey Scandizzo, hairstylist and co-creative director of hair-care brand ELEVEN Australia, agrees. “It doesn’t have to be freshly washed," he says. " Second or third-day hair is actually even better for a messy bun look because the hair has more texture and grip to work with.”

Step 2: Section Your Locks
If you have bangs or face-framing pieces you want to leave out of the messy bun, now is the time to section them out. “For the perfect messy bun style, start by separating your front hair from your back hair,” Megan Schnell, celebrity and bridal hairstylist shares. “Clip any fringe or shorter pieces with no-crease clips to keep them out of the way before tying your hair back.” After this, you can find the part of your choosing (whether it’s a middle or a side part).
Step 3: Add Product
Products are your best friends when it comes to completing the perfect messy bun! Just as using a makeup primer makes makeup last all day and look its best, the same can be said for hair products.
For those with finer hair, Scandizzo recommends a texture spray or dry shampoo. “Fine hair can often be harder to style or hold in place so using a dry shampoo or texture spray will help keep the bun in place and will help add that extra volume.” Kimble agrees and says that if your hair is still falling flat, you might want to consider adding in a few clip-ins to fill out the look.
But if your hair already has tons of texture, opt for a curl cream. “Textured hair has a lot more movement already, so you don’t need to try as hard to make it messy because there’s already texture there,” says Kim Kimble, founder of Kim Kimble Hair Collection. “I’d recommend using curl-defining products so the hair doesn’t look frizzy but also keeps it looking moisturized.”
And if you have flyaways that look too messy, even for a messy bun, Schnell says to go in with a wax stick or hair oil.
Step 4: Do the Twist
Now comes the fun part—twisting your hair into a bun! “After pulling your hair back in a loose ponytail, twist the ponytail and wrap it around the base to create that loose bun,” Scandizzo tells us. “You can secure the bun with a hair tie or even use a couple of bobby pins.” And if you want to go the extra mile, you can even curl your hair beforehand to give it even more of a lived-in feel.
Step 5: Loosen It Up
Once your hair is in position, it’s time to loosen things up—after all—it is a messy bun! The more imperfect, the better. “Pull pieces out after tying the bun to achieve that ‘effortless’ feel,” Schnell shares with InStyle. “Leaving a few pieces out in front will add dimension and interest to the style.” Use your fingers to play around with your strands, pulling out and loosening pieces that look too put-together. Finish off with some hairspray!

Added Tips Based on Length
With Long Hair
Not sure how to do a messy bun on long hair? The steps will be the same, but sectioning (aka, step two), is going to be key. “Start with clips to separate the front of your hair from the back of your hair,” says Schnell. “Make a ponytail with the back section at your desired pony height, then gather the remaining hair in the front into the ponytail to finish the full pony. Using multiple elastics and bobby pins, you can play with the height and shape of the bun.” Kimble adds: “You may need to work with a few more ponytail holders and bobby pins to keep the hair in place,” she says. “You may also want to use styling products that will help hold the look if you have long, thick hair that tends to be heavier.”
With Short Hair
If your hair is short to the point that you can’t properly pull it back into a ponytail, Schnell suggests going for a half-up messy bun, since the hair closer to the nape of the neck likely won’t be able to be pulled up properly. “If you have short hair, a half-up messy bun is the way to go,” she shares. “Create a part from the top of your ear over your crown to the opposite ear, and then style it into a half-up look. This gives the bun more structure and adds volume.”
A Messy Low Bun
A messy low bun can be achieved using the exact same steps as above, but Scandizzo has a method to take it to the next level. “Lower buns could be a lot easier and faster to style,” he shares. “You could braid your hair and then wrap the braid into a low bun or you can use one of those scarf hair ties for a fun look.” Once you’ve braided your ponytail, use your fingers to loosen it up, and finally, twist it into a bun.
